个人博客:
http://www.milovetingting.cn
VirtualAPK的简单使用
VirtualApk引入步骤:
一、宿主应用引入VirtualApk
1、在项目的build.gradle文件中加入依赖
1
2
3
| dependencies {
classpath 'com.didi.virtualapk:gradle:0.9.8.6'
}
|
完整的gradle文件如下:
1
2
3
4
5
6
7
8
9
10
11
12
13
14
15
16
17
18
19
20
21
22
23
24
25
26
27
28
|
buildscript {
repositories {
google()
jcenter()
}
dependencies {
classpath 'com.android.tools.build:gradle:3.1.4'
classpath 'com.didi.virtualapk:gradle:0.9.8.6'
}
}
allprojects {
repositories {
google()
jcenter()
}
}
task clean(type: Delete) {
delete rootProject.buildDir
}
|
2、在app的build.gradle文件中加入依赖
1
2
3
4
5
| apply plugin: 'com.didi.virtualapk.host'
dependencies {
implementation 'com.didi.virtualapk:core:0.9.8'
}
|
完整的gradle文件如下:
1
2
3
4
5
6
7
8
9
10
11
12
13
14
15
16
17
18
19
20
21
22
23
24
25
26
27
28
29
30
31
| apply plugin: 'com.android.application'
apply plugin: 'com.didi.virtualapk.host'
android {
compileSdkVersion 28
defaultConfig {
applicationId "com.wangyz.virtualapk.host"
minSdkVersion 21
targetSdkVersion 28
versionCode 1
versionName "1.0"
testInstrumentationRunner "android.support.test.runner.AndroidJUnitRunner"
}
buildTypes {
release {
minifyEnabled false
proguardFiles getDefaultProguardFile('proguard-android.txt'), 'proguard-rules.pro'
}
}
}
dependencies {
implementation fileTree(dir: 'libs', include: ['*.jar'])
implementation 'com.android.support:appcompat-v7:28.+'
implementation 'com.android.support.constraint:constraint-layout:1.0.2'
testImplementation 'junit:junit:4.12'
androidTestImplementation 'com.android.support.test:runner:1.0.1'
androidTestImplementation 'com.android.support.test.espresso:espresso-core:3.0.1'
implementation 'com.didi.virtualapk:core:0.9.8'
}
|
3、新建项目的Application,继承自Application,并在attachBaseContext方法中初始化
1
2
3
4
5
6
7
8
| public class App extends Application{
@Override
protected void attachBaseContext(Context base) {
super.attachBaseContext(base);
PluginManager.getInstance(base).init();
}
}
|
4、在AndroidManifest.xml中引入自定义的Application
1
2
3
4
5
6
7
8
9
10
11
12
13
14
15
16
| <application
android:name=".App"
android:allowBackup="true"
android:icon="@mipmap/ic_launcher"
android:label="@string/app_name"
android:roundIcon="@mipmap/ic_launcher_round"
android:supportsRtl="true"
android:theme="@style/AppTheme">
<activity android:name=".MainActivity">
<intent-filter>
<action android:name="android.intent.action.MAIN" />
<category android:name="android.intent.category.LAUNCHER" />
</intent-filter>
</activity>
</application>
|
5、申明权限
1
2
| <uses-permission android:name="android.permission.READ_EXTERNAL_STORAGE" />
<uses-permission android:name="android.permission.WRITE_EXTERNAL_STORAGE" />
|
二、Plugin中引入VirtualApk
1、在项目的build.gradle文件中加入依赖
1
2
3
| dependencies {
classpath 'com.didi.virtualapk:gradle:0.9.8.6'
}
|
完整的gradle文件如下:
1
2
3
4
5
6
7
8
9
10
11
12
13
14
15
16
17
18
19
20
21
22
23
24
25
26
27
28
|
buildscript {
repositories {
google()
jcenter()
}
dependencies {
classpath 'com.android.tools.build:gradle:3.1.4'
classpath 'com.didi.virtualapk:gradle:0.9.8.6'
}
}
allprojects {
repositories {
google()
jcenter()
}
}
task clean(type: Delete) {
delete rootProject.buildDir
}
|
2、在app的build.gradle文件中加入依赖
1
2
3
4
5
6
7
| apply plugin: 'com.didi.virtualapk.plugin'
virtualApk{
packageId = 0x6f
targetHost = '../../VirtualAPKHost/app'
applyHostMapping = true
}
|
3、在app的build.gradle文件中加入签名配置
1
2
3
4
5
6
7
8
9
10
11
12
13
14
15
16
| signingConfigs{
release{
storeFile file('../../android.keystore')
storePassword "android"
keyAlias "android"
keyPassword "android"
}
}
buildTypes {
release {
minifyEnabled false
signingConfig signingConfigs.release
proguardFiles getDefaultProguardFile('proguard-android.txt'), 'proguard-rules.pro'
}
}
|
完整的gradle文件如下:
1
2
3
4
5
6
7
8
9
10
11
12
13
14
15
16
17
18
19
20
21
22
23
24
25
26
27
28
29
30
31
32
33
34
35
36
37
38
39
40
41
42
43
44
| apply plugin: 'com.android.application'
apply plugin: 'com.didi.virtualapk.plugin'
android {
compileSdkVersion 28
defaultConfig {
applicationId "com.wangyz.virtualapk.plugin"
minSdkVersion 21
targetSdkVersion 28
versionCode 1
versionName "1.0"
testInstrumentationRunner "android.support.test.runner.AndroidJUnitRunner"
}
signingConfigs{
        release{
            storeFile file('../../android.keystore')
            storePassword "android"
            keyAlias "android"
            keyPassword "android"
        }
    }

	buildTypes {
       release {
           minifyEnabled false
           signingConfig signingConfigs.release
           proguardFiles getDefaultProguardFile('proguard-android.txt'), 'proguard-rules.pro'
       }
   }
}
dependencies {
implementation fileTree(dir: 'libs', include: ['*.jar'])
implementation 'com.android.support:appcompat-v7:28.+'
implementation 'com.android.support.constraint:constraint-layout:1.0.2'
testImplementation 'junit:junit:4.12'
androidTestImplementation 'com.android.support.test:runner:1.0.1'
androidTestImplementation 'com.android.support.test.espresso:espresso-core:3.0.1'
}
virtualApk{
packageId = 0x6f
targetHost = '../../VirtualAPKHost/app'
applyHostMapping = true
}
|
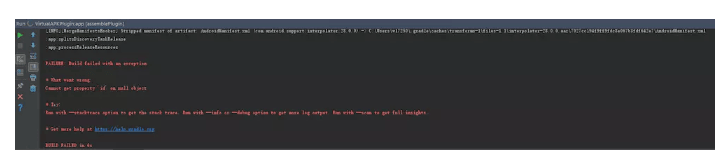
注意:Plugin应用的资源文件不能和宿主的资源文件重名,否则在生成插件APK时会报错:
建议各模块资源命名以模块名开头。
4、生成插件APK
打开gradle窗口,双击assemblePlugin,生成APK
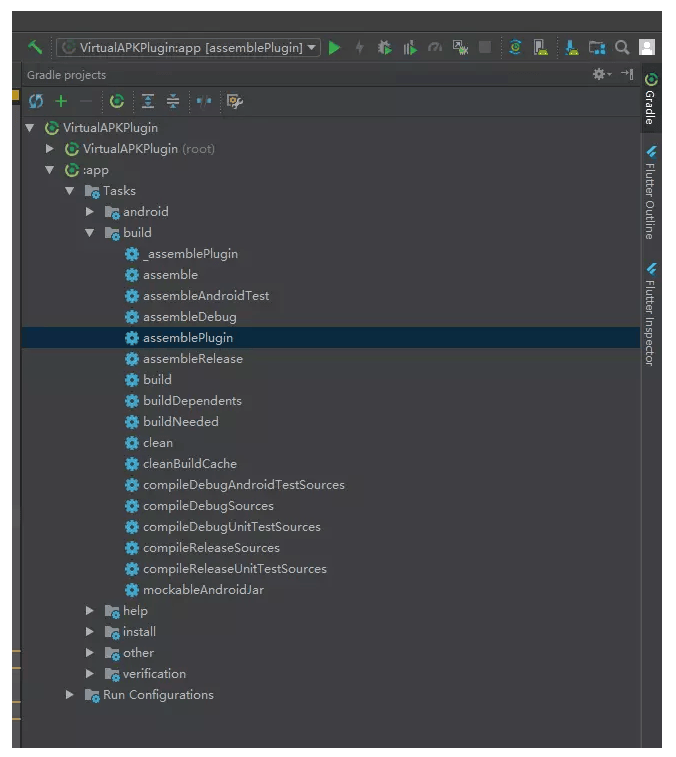
文件生成目录:app/build/outputs/plugin/release/
三、在宿主应用中加载插件APK
1、将生成的插件APK推送(通过网络或者adb等)到手机指定路径,如/sdcard/Plugin.apk。
2、在宿主应用中加载APK
1
2
3
4
5
6
7
8
9
10
11
12
| private static final String PLUGIN_PACKAGE_NAME = "com.wangyz.virtualapk.plugin";
private static final String PLUGIN_NAME = "com.wangyz.virtualapk.plugin.MainActivity";
private void loadPlugin() {
try {
String pluginPath = Environment.getExternalStorageDirectory().getAbsolutePath().concat("/Plugin.apk");
File plugin = new File(pluginPath);
PluginManager.getInstance(this).loadPlugin(plugin);
} catch (Exception e) {
e.printStackTrace();
}
}
|
3、调用APK中的Activity
1
2
3
4
5
6
7
8
9
| public void loadPlugin(View view) {
if (PluginManager.getInstance(this).getLoadedPlugin(PLUGIN_PACKAGE_NAME) == null) {
Toast.makeText(getApplicationContext(), "未加载插件", Toast.LENGTH_SHORT).show();
return;
}
Intent intent = new Intent();
intent.setComponent(new ComponentName(PLUGIN_PACKAGE_NAME, PLUGIN_NAME));
startActivity(intent);
}
|
源码地址:https://github.com/milovetingting/Samples/tree/master/VirtualAPK